XONE 43C
Configuración Avanzada
AUDIO SETUP - DVS
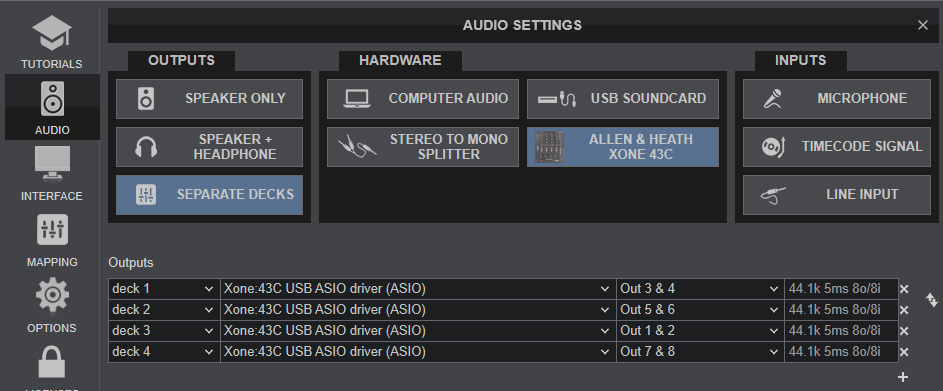
The following image displays the default Audio setup for the Xone 43C, which requires speakers to be connected at the rear panel.

The Xone 43C offers 4 stereo input for the USB Audio interface which can be used to connect up to 4 Timecode (Vinyl or CD) devices.
For DVS (Timecode control), you will need to ...
- Connect your Turntable with Timecode Vinyl to any of the 4 rear-panel Inputs and set their USB switcher to PH
- Connect your CD Player with Timecode CD to any of the 4 rear-panel Inputs and set their USB switcher to LN
- Make sure the top SOURCE switchers are set to USB
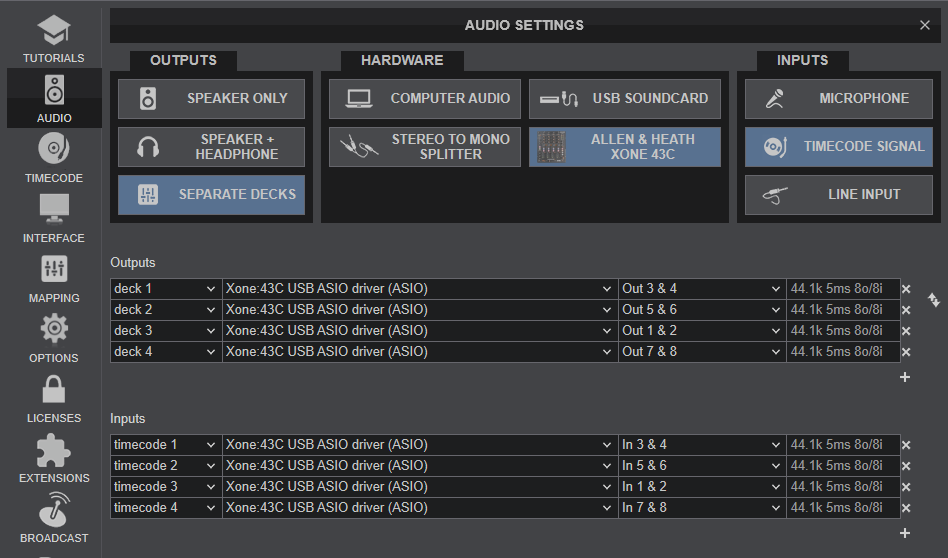
- In VirtualDJ Settings->AUDIO tab, press the TIMECODE SIGNAL button for Timecode Inputs to be added as per the following image. You can delete any of these if you don't intend to use all 4.

For further setup information about Timecode in VirtualDJ, please refer to VirtualDJ Manual
Record & BROADCAST
The Xone 43C is a hardware mixer applying its own mixing, thus recording/broadcasting will not be properly working out of the box.
You will need to ..
- Route the audio signal from the rear-panel Record 1/4" input to one of the 4 available Inputs using a 1/4" to 2xRCA cable.
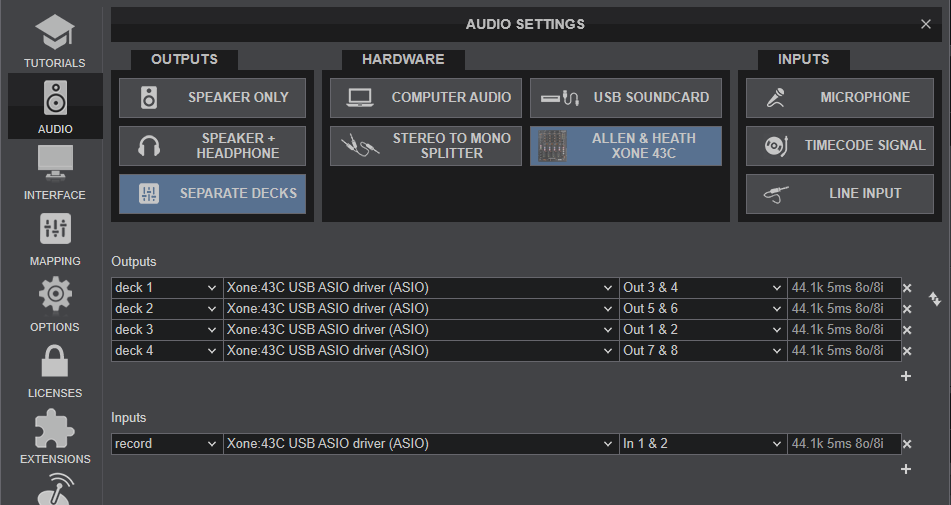
- Manually add a Record line to VirtualDJ Audio Setup, pointing to the relative USB Channel of the Xone 43C Input
The following image shows the VirtualDJ Audio Setup with the default output configuration and a " Record " input that has been manually added, pointing to Channels 1,2.

Note, that Video mixing is still possible, despite the fact that the Crossfader of the Xone 43C is not sending MIDI. See our Mixing Guide - Wiki page
MIDI SETUP
The Xone 43C should be visible in the Mapping tab of VirtualDJ Settings and the “factory default” available/selected from the Mappings drop-down list.
It's only a few controls (Volume, CUE, Filter ON etc.) that can be assigned to a VDJ script action, but it is highly advised not to do so, unless you use a different audio interface and/or mixer and you need to use the Xone 43C only as a MIDI device.
Note : If you have connected a Xone K2 to the rear-panel XLINK socket, the MIDI functionality of the K2 will be offered through the Xone 43C (thus the Xone 43C Mapping includes all the K2_ keys). For further operations of the Xone K2 connected via XLINK, please refer to the Xone K2 Manual


